Rosemarie's Belly Button Start for Circular Knitting Projects
1. Start out with two of the dp needles you'll be using to knit your chosen pattern. (You can switch to your circular needles at the usual time, when your project is big enough.)
2. Using (I prefer cotton) a Size 5 or thicker thread (heavier, contrasting colour acrylic yarn works, too), cast onto ONE needle, the number of stitches called for in your circular pattern. The contrasting thread/yarn colour is important, as this will help you when it comes time to remove the belly button.
For example: If your circ. pattern calls for 12 stitches divided between four needles, then simply cast 12 stitches onto one dp needle.
I will be using the "12 stitches" as my example, but adapt the beginning stitch numbers to whatever your patterns says.
3. Now ... simply knit back and forth until you have a piece about an inch long. Tension is important, please, knit tightly! You need this piece to be very firm, as this will make supporting the multiple needles much easier!
4. Then: divide those 12 stitches onto the four double pointed needles (or whatever the pattern calls for).
5. Knit two or three times around, using the same heavy cotton thread (or acrylic yarn). Essentially, you are now knitting a glorified "I-cord". Be sure to pull the thread tightly between needles, to avoid "ladders".
This is an important step for beginning the actual pattern. If you don't pull the heavy thread tightly, you will have gaps in the belly-button that will likely translate into gaps in your pattern knitting. The "belly-button" you're knitting should be very firm, if you're using large enough heavy thread and have lots of tension.
6. Drop the heavy thread. Now, using the thread you have chosen for your project, knit one or two times around, (do not start knitting your pattern yet!),keeping the tension firm, knitting the project thread right into the last round of the heavy thread.. Be sure you leave a "tail" on your project thread long enough to thread through a needle with an eye (I usually leave about 60 cm or 2 feet).
7. Now start knitting your pattern.
Finishing the centre:
You may choose to do Steps 8 - 12 at any time.
8. Thread your project thread through a sharp-pointed sewing needle. Very carefully thread it through the first round of stitches of the PROJECT THREAD, the ones which are knitted into the last round of the heavy thread.
9. Pull the tail thread slowly and carefully, making sure you have picked up all 12 stitches on that first round of the project thread. I use a lighted magnifying lamp, although a good light and reading glasses will work, too. You may pull the tail thread tightly, or leave it in a more open "o" style, whatever suits you.
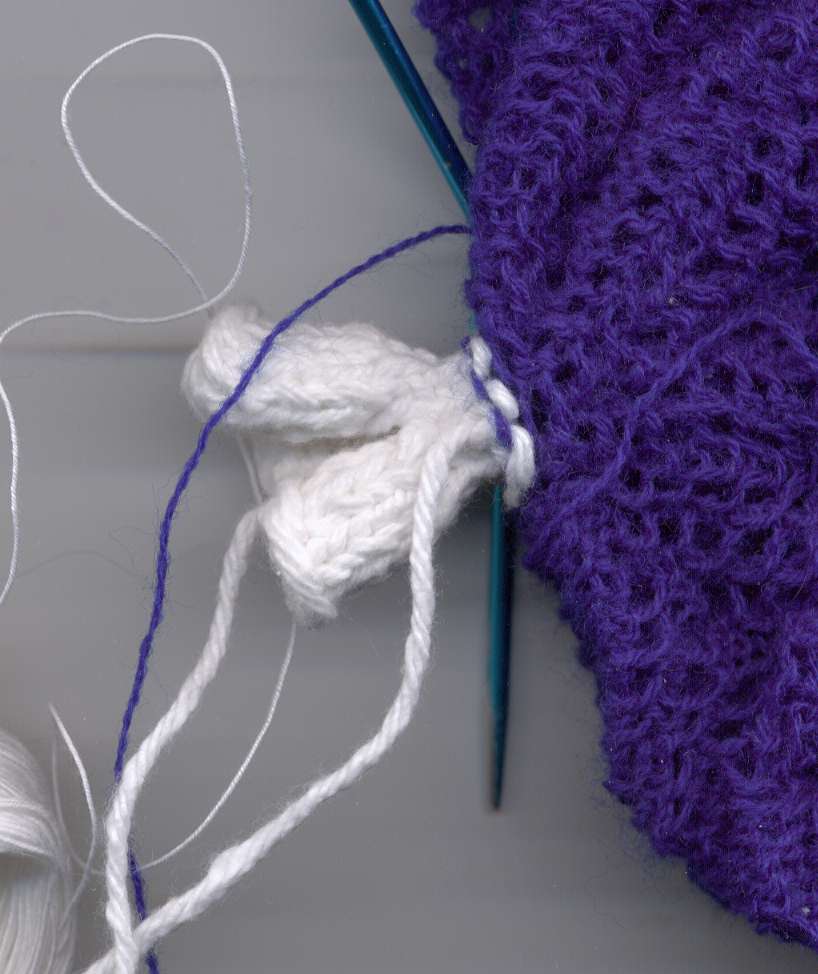
This is the belly button on my Lyra, one of Herbert Niebling's legendary patterns.)
10. Take the tail thread one more time through all 12 stitches, and then fasten or tie it off in whatever style you usually use.
11. With a pair of very sharp, very small scissors, cut off the belly-button (being the heavy thread), being very careful to not cut any of the thread of your project.
12. You can throw away the belly-button, or put it in your portfolio, with date and time of delivery (kidding ).
No comments:
Post a Comment